View as PDF

View report

Logo

CURTIS C HOME INSPECTION SERVICE, LLC

https://www.curtischomeinspections.com
curtiscservices@yahoo.com
(360) 296-4020
5614 Starry Rd 
Bellingham WA 98226-9714
Inspector: Curtis C Brown
Licensed Home Inspector DOL#368
Licensed Structural Pest Inspector WSDA# 76712

Summary

Client(s):  Happy Investor
Property address:  1234 Neighborhood Loop
Bellingham WA 98765
Inspection date:  Friday, March 2, 2018

This report published on Saturday, May 15, 2021 12:16:52 PM PDT

This is not the complete report. This is the report summary. The concerns listed here are, in the inspector's opinion, more likely to be the higher priority issues that require immediate attention. This summary is not numerically sequential as it plucks descriptions from the full report but leaves them at the same number they had in the full report. Since a client might put more priority on some concerns, that might seem routine to an inspector, the non-summary items should not be ignored. The client should read the full report.
This report is the exclusive property of CURTIS C HOME INSPECTION SERVICE, LLC and the client(s) listed in the report title. Use of this report by any unauthorized persons is prohibited.

Concerns are shown and sorted according to these types:
Concern typeCautionaryA recommendation to enhance safety. Not necessarily urgent but, in some instances, it might be
Concern typeReplace/RepairPlan on replacement,, or repair, with work to be done by qualified parties
Concern typeRepair/MaintainRecommended repairs that may involve ongoing upkeep. Work to be completed by qualified parties
Concern typeReview/EvaluateQualified professional to service/repair/replace/evaluate. Or, as applicable, clients to evaluate information and determine their level of concern
Concern typeMaintenance/Service (repair)Requires maintenance, professional service or appropriate repair
Concern typeVisual limitationsCondition that, potentially, conceals moisture-related issues or damage. At client's option, accept as is/maintain or arrange for further evaluation or invasive contractor review
Concern typeMonitorKeep an eye on (periodically monitor) the condition or device. Maintain, repair or replace as might be required
Concern typeOn-site notesObservations, comments or suggestions noted by the inspector
Concern typeInformationalInformational comment, but might include recommendations for small repairs or upgrades
Concern typeConducive conditionsConditions conducive for wood destroying insects or organisms (Wood-soil contact, shrubs in contact with siding, roof or plumbing leaks, etc.)


General Information
1) PNW region pests: Pests such as rodents (mice, rats or squirrels), aggressive species of insects (hornets or wasps), nesting birds or potentially destructive woodpeckers, bats in some areas, and wood destroying insects are frequently seen in this region. Rodents will climb and a mouse can squeeze through a hole the size of a dime. A rat can pass or gnaw through a hole the size of a quarter and a squirrel can go through a 1 1/2" diameter opening. If observed onsite, I report signs of pests and vulnerabilities that might lead to infestation. Access and view are often restricted, property owners should be on the lookout for pest activity. As necessary, block any potential entry points. Correct conditions that are conducive to attracting pests: establish sufficient clearances between plants and the exterior, eliminate wood to soil contact, excess moisture and/or access to food sources. Pests are opportunistic, nomadic, and rodents can be a health concern. If an infestation is suspected, implement corrective measures and/or consult with a licensed pest management firm. Carpenter ants are more active seasonally, typically in warm weather than at other times of the year.

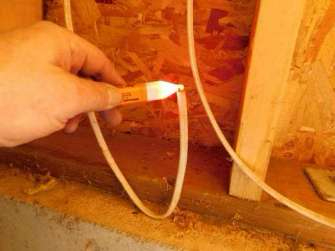
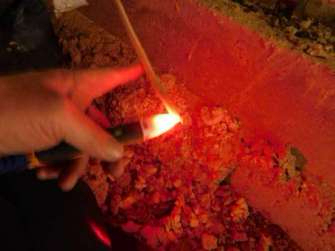
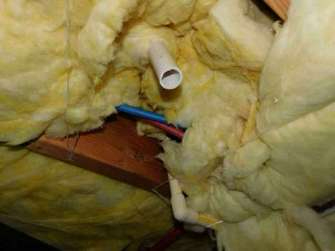
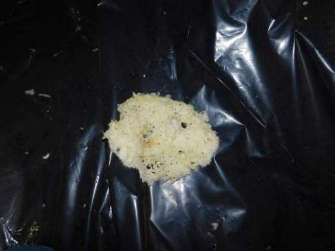
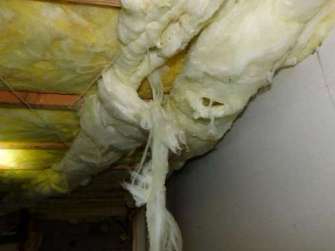
At time of inspection, signs of past or present rodent activity were noted in the form of odors, droppings, seed shells and or damaged insulation in all crawl spaces. Often it is not possible to determine the current status of pests. Rodents are commonly seen, often moving around from one location to another, and they can cause extensive damage. If pests gain access to one area, they are likely to be active at other locations as well. I recommend further evaluation, consulting with a pest management professional. A qualified person should make repairs to seal openings in the structure, set traps, and clean rodent waste as necessary. Recommend following guidelines in these Center for Disease Control articles:
http://www.reporthost.com/?SEALUP
http://www.reporthost.com/?TRAPUP
http://www.reporthost.com/?CLEANUP

See crawlspace section for further comments regarding rodents.

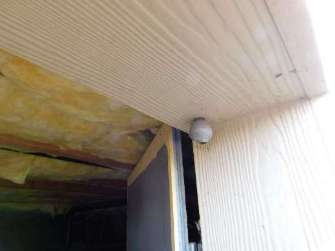
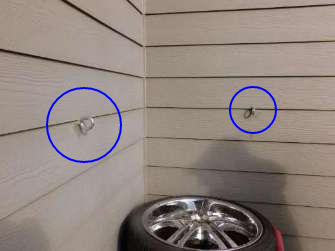
The photos below illustrate wasp or hornet nests, found in locations such as exterior electric panels, crawlspace entrance, soffits, etc.I recommend qualified party, such as a pest control operator maintain aggressive insect activity as necessary.
Photo
Photo 1-1 Wasp or hornet nest at main disconnect breaker at exterior panel
Photo
Photo 1-2 Wasp nest at entrance to crawlspace.
Photo
Photo 1-3 Chew marks on pipe insulation. See crawlspace section for further comments regarding Grodin access

Exterior & Site
8) Conducive conditionsThe fiber cement lap siding is loose, insufficiently attached-nailed to the house and or damaged at multiple locations. I recommend further review: General contractor, familiar with installing fiber cement siding, to repair accordingly. Here's an instructional online video that describes the best methods for installing and attaching fiber cement siding: http://youtu.be/5Qwax7d9O_k

Further review and repair is recommended, photos below are examples of this condition:
Photo
Photo 8-1 Broken siding above crawlspace access at West side of structure
Photo
Photo 8-2 The laminated lap siding at West side of structure
Photo
Photo 8-3 Loose siding at West side of structure
Photo
Photo 8-4 Tenant damage to siding at unit 104 in the form of I-screw attachments.
Photo
Photo 8-5 Broken and loose lap siding at unit 105 entry.
9) Conducive conditionsCaulking has not been applied, or it is shrinking/deteriorating, at some locations such as around wires, pipes or conduits that pass through the exterior wall. Periodically, at any building, caulking must be maintained or replaced. Missing or failed caulking is contributory to moisture penetration, pest entry or the onset of wood decay fungi (rot).
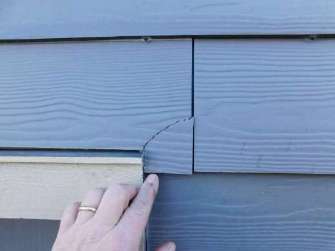
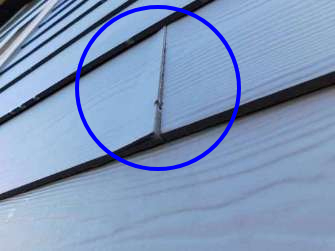
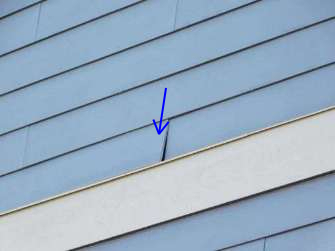
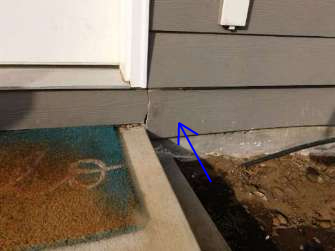
At fiber cement lap siding butt joints where flashings have been installed, as present here at the structure, butt joints should be left open, not caulked.
I recommend further review: Apply, replace or upgrade caulking as necessary. If/where caulking is not a suitable filler-sealant, gap wider than 1/4", repair, patch or fill in an appropriate manner. Upon completion of repair, apply a durable exterior finish. All work to be performed by qualified party. To learn more about effective caulking techniques, please visit: http://goo.gl/tlAjDC

Finish-paint: The exterior finish is deteriorating at some locations such as at the wood corner trim, window trim, fascias, belly-bands, etc. Failed paint is conducive to moisture absorption and can result in swelling or wood decay fungi (rot). I recommend further evaluation: Where/as necessary, refinish the exterior. When work takes place, if damage is noted, replace materials. Then clean-prep and, if applicable, apply caulking and/or install flashing to protect against seepage. Complete the job by sealing surfaces with a durable exterior finish. All work to be performed by qualified painting and/or general contractor. For detailed information on applying exterior preservatives, please visit: http://www.reporthost.com/?PAINT

To learn more about effective caulking techniques, please visit: http://goo.gl/tlAjDC

Photos below are examples:
Photo
Photo 9-1 Penetrations, such as pipes and wires should be caulked and maintained
Photo
Photo 9-2 Any gaps in trim, where siding needs trim should be repaired and maintained
Photo
Photo 9-3 Example of a failed caulk where siding meets trim and failed paint at trim. Caulking should be installed prior to paint. Any wood components where paint has failed and exposed wood, should be scraped, sanded and primed prior to paint.
Photo
Photo 9-4 Current recommendations for fiber cement lap siding insulation would be to have flashings behind butt joints. At time of expection, observed at various locations, flashings appeared to be installed behind butt joints. Therefore, caulking is not necessary at these locations.

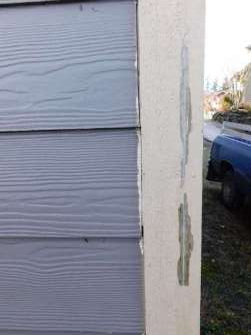
Note, white staining visible in this picture, West side of structure, appears to be a foreign material, not damage to the siding
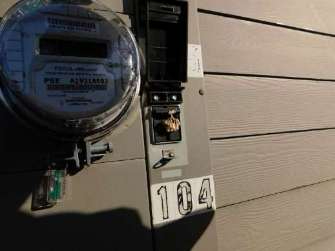
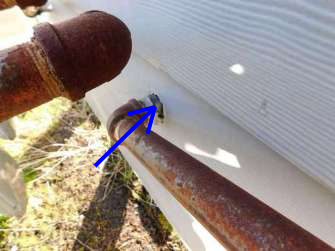
Photo
Photo 9-5 Failed or deteriorated paint noted and barge rafter at a roof transition

Electric System
31) Exposed wiring: Wires or splices that are not properly terminated, and/or contained in covered junction boxes, were seen in the crawl spaces. This is a safety concern. I recommend further evaluation: Licensed electrician to repair/replace. While onsite, electrician to assess the electrical system, verify accuracy of legends, report any concealed defects/safety concerns and suggest potentially beneficial system upgrades.

This condition occurred at all crawlspaces and near the entries. Photo examples:
Photo
Photo 31-1 Crawl space below unit #105 had a receptacle connected to the end of the conductor not contained in a junction box. This is significant safety concern
Photo
Photo 31-2 All other crawl spaces had life conductors not terminated in junction boxes.
Photo
Photo 31-3 Location of this concern is near the entrances of all 5 crawlspaces
32) Ground fault (GFCI) protection testing limitations: During the course of a mandatory ground fault protection evaluation at time of inspection, in unit #105, a GFCI at the kitchen counter to the left of the sink was tripped and failed to reset during a normal test. The receptacle is defective and as a result receptacles in line with of the defective GFCI, multiple receptacles at the kitchen counter and south wall of the kitchen and living room were without power. As per comments by the tenant, power has been lost to the circuits in the past. In addition to any other recommended repairs noted in this report. I recommend a licensed electrician evaluate failed GFCI at unit 105 and repair or replace as necessary.

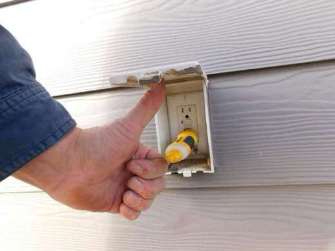
Additionally, due to stored belongings, some receptacles that currently require GFCI protection were not tested. GFCI receptacles or breakers reduce the likelihood of serious electrical shocks in damp environments. If receptacles are GFCI protected, and they do trip, I may not be able to locate resets and restore power. I recommend further evaluation: When excluded areas are clear of belongings, and resets are readily accessible, check the operation of receptacles. If GFCI protected receptacles are not installed, and fully operational in the typically recommended locations, consult with licensed electrician. Since conditions change, and electrical components can fail, clients should, periodically, verify the functionality of GFCI devices.

With the exceptions noted above, all accessible GFCI receptacles were tested to be functional. This would also include 10 exterior GFCI receptacles found at front entrances and balconies, all tested functional at time of inspection.
Photo
Photo 32-1 GFCI outlets at exterior locations were functional when tested

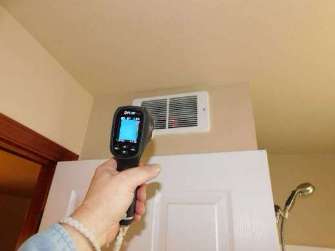
Heating & Ventilation
38) Non-operational electric heater(s). A wall-mounted electric fan assisted heaters in the lower floor bathroom of unit #101, when turned on, failed to warmup. The 2 heaters tied to the thermostat in the kitchen living room area at #unit 102 had been running recently, felt warm to the touch yet the ambient room temperature seem to be lesser than the thermostat setting of 75°F. Additionally, some other wall-mounted electric fan assisted heaters at various locations were slow to respond but did operate. I recommend further evaluation: qualified person such as an electrician to verify operation, repair/replace thermostat or heaters if/as necessary when cleaning and related work takes place.

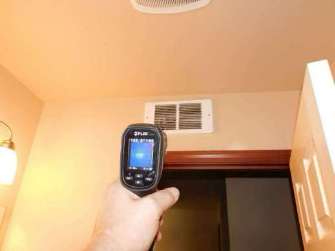
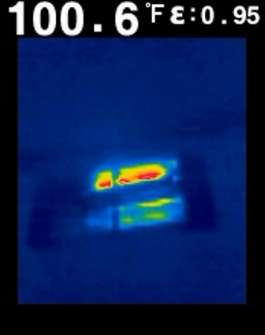
At this multiunit structure, wall-mounted electric fan assisted heaters were noted to be installed in all livable spaces. In the kitchen living room areas of all units a single thermostat operated two heaters. All other rooms, such as bedrooms and bathrooms, heaters were all on a separate thermostat.

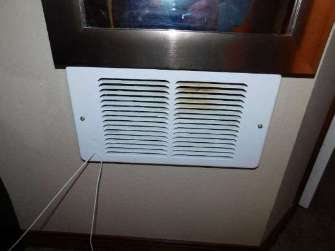
Electric heaters general information: Many wall-mounted electric fan assisted heaters were noted to be dirty. Grill discoloration can be caused by concentrated heat as a result of dirt or lint at heating elements. Airborne particles in the environment enter heaters and partially burn, leaving behind carbon material that clings to grills. Exposure to burning candles, cooking, cleaning supplies, pets, and plants can exacerbate the matter. In the case of all electric heaters, the devices are manufactured with long design lives, but they require periodic cleaning. Lint, dust and debris can block airflow, negatively impact efficiency, and increase the risk of fire. High voltage is present inside electric heaters: If covers are removed, circuit breakers to heaters must be TURNED OFF and "locked-out" prior to opening heaters.

A manufacturer produced online video, general information applicable to cleaning electric wall heaters, is available here: http://youtu.be/HxQhyev5FfI

Inspection procedure: Detailed analysis of heaters is not provided, e.g., calibration of thermostats, condition of internal heating elements. The inspector does not estimate remaining life or track product recalls. Flammables, including furniture, towels, towel racks, linens, drapes, appliance cords, etc. should not be situated in close proximity to, or installed directly over, electric heaters. Maintain, as minimums, 6" of clearance above and at least 2"-3" of clearance in front of heaters. Licensed electricians are prepared to work on electric heaters.
Photo
Photo 38-1 Unit #101, lower floor bathroom, wall-mounted fan assisted electric heater did not operate at time of inspection
Photo
Photo 38-2 Grill discoloration at multiple wall heaters. I recommend qualified party to clean and maintain as necessary
Photo
Photo 38-3 An infrared imaging thermometer is used to measure heat at wall-mounted fan assisted electric heaters
Photo
Photo 38-4 An infrared image of a wall-mounted fan assisted electric heater in operation

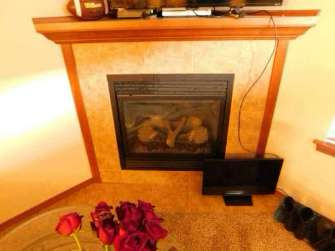
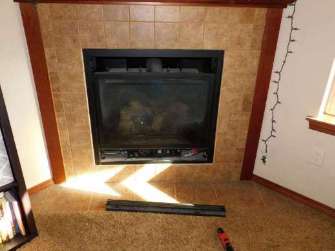
Fireplace(s), Insert(s), Freestanding Stove(s)
42) Ceramic glass, front of the gas fireplaces are fogged to some degree at all fireplaces. Mineral residue collects on glass, a by-product of combustion, and fogged glass is indicative of a need for maintenance and cleaning. I recommend further evaluation and service by a heating contractor: Professional review to include burner, combustion chamber, air openings, gas valve, igniter and pilot, venting and combustible clearances for the length of the run, remove and clean glass and inside unit, inspect gasket, and, as applicable, carbon monoxide (CO) testing, operation of fan-blower, thermostat, etc. A gas fireplace/stove that serves as a primary heat source should be professionally serviced annually. If it is used only on an occasional basis, the appliance requires service, at a minimum, every three years. Any heat circulating fans or blowers (usually thermostatically controlled devices) are excluded. I do not disassemble/lift off fronts of fireplaces, if putting parts back together again could be difficult to do. A contractor produced online video, descriptive of general maintenance, cleaning procedures and glass removal, is available at this link: https://youtu.be/br6Hmg95RAs

Here's a link to a consumer bulletin, issued by the nearby B.C. Safety Authority, that emphasizes the importance of regularly scheduling safety checkups at all gas heating appliances and fireplaces: http://goo.gl/pN1WT2

Ceramic glass, at the front of gas fireplaces, inserts and stoves, should be cleaned twice per year or as specified by manufacturer. Employ specialized cleansers formulated for the purpose, do not use ammonia-based products that could permanently etch glass. If periodic maintenance has been neglected in the past, the glass front may have become perpetually cloudy.
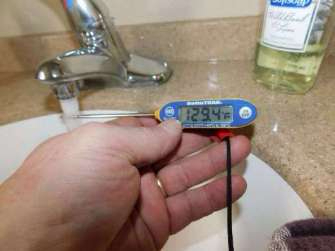
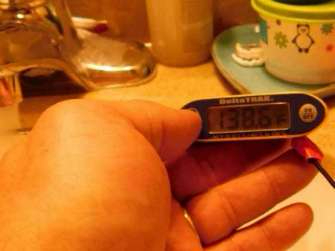
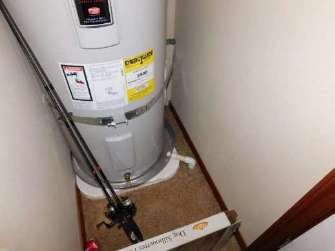
Photo
Photo 42-1 I recommend professional servicing to all Gas-fired fireplaces
Photo
Photo 42-2 

Water Heater
46) The hot water temperature at fixtures reads as a minimum of 129 degrees Fahrenheit at unit #101 and 138 °F at unit #103. (Other 3 units were within recommended ranges, between 110 and 120°F) The risk of scalding increases when temperature is set higher than 120°F I recommend adjusting/limiting the water temperature at fixtures to 120°F. Water temperature is regulated by thermostatic controls at/inside water heaters. Temperature may vary throughout the day, depending on when the appliance last heated water. Even though temperature at fixtures should be limited to 120°F, maintaining a higher tank temperature reduces the probability of bacterial growth inside the water heater. Therefore, a preferred means of lowering temperature involves installing a thermal mixing valve: Water at fixtures is restricted to 120°F, yet water in the tank will maintain a temperature of 130-140°F At client’s discretion, qualified party to adjust thermostat(s) or have a plumber install thermal mixing valve. To obtain more information on hot water safety, please visit: http://goo.gl/IS7knJ

An article, descriptive of thermal mixing valves, is available at this link: http://goo.gl/sqzs3t
Photo
Photo 46-1 Water over 120°F at unit #101
Photo
Photo 46-2 Water over 120°F (138°F) at unit #103
47) Conducive conditionsThe catch pan, under the water heater, drain lines are directed to substructure. A leak could result in moisture damage at finished interior space. I recommend further evaluation by professional, plumber or HVAC technician to install a catch pan with a drain line to the exterior. An article, descriptive of other potential remedies for water heaters that could leak and cause interior damage, is available at: http://goo.gl/dn0Do6
Photo
Photo 47-1 Drain pan at base of water heaters with drain lines protruding through the floor (Consistent application at all 5 water heaters)
Photo
Photo 47-2 All 5 water heater drain pan, drain lines terminate in the substructure below

Plumbing System & Laundry
51) The exterior dryer hoods (to some degree, at all units) contains an accumulation of lint. As the problem worsens, a blockage could lead to fire, or damage the thermal devices inside the dryer. I recommend cleaning the dryer hood, and associated ducting, now and as necessary in the future. Work to be completed by qualified party. To obtain additional information on dryers and ducting, please visit: http://goo.gl/B2i6QT
Photo
Photo 51-1 Dryer duct exhaust cap at unit #103 was significantly blocked with lint and dryer sheets. (Possibly missing a filter at the appliance) at time of inspection, the inspector pulled debris from the exterior exhaust cap, however, maintenance is necessary
Photo
Photo 51-2 All dryer exhaust ducts appeared to be due for maintenance
Photo
Photo 51-3 Louvered baffles at dryer exhaust end cap associated to unit #105 appeared to have thumbtacks glued to the louvers for an undetermined purpose. Attachments could deter proper airflow through exhaust duct

Crawl Space(s)-Foundation
57) Pest entry point: Gaps that could allow pests or rodents (and water) access to the substructure area was noted at all crawl space accesses. Mice and rats are often seen, able to gain entry through small (3/4" to 1") openings, and the creatures can cause significant damage to building materials. I recommend locating and eliminating any potential pest entry gaps, monitor the property for rodent activity, and, if necessary, consult with a pest management professional. If pests gain entry to any part of a building, they could be present at other areas as well. See additional recommendations in the "General information" report section.

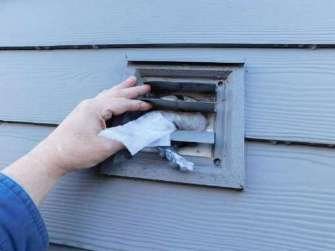
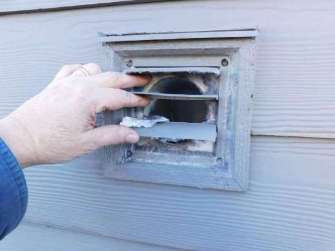
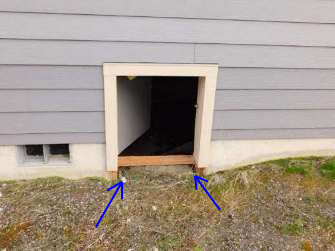
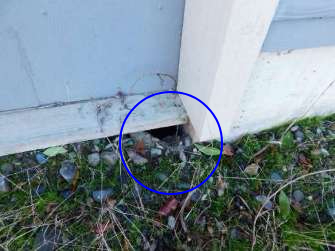
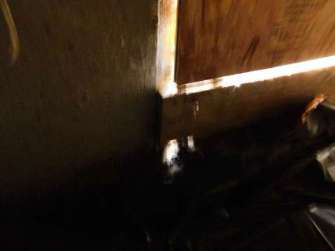
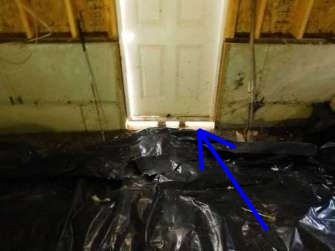
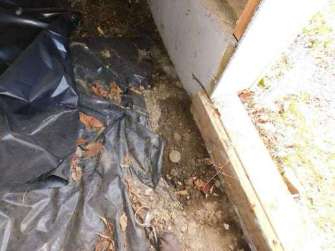
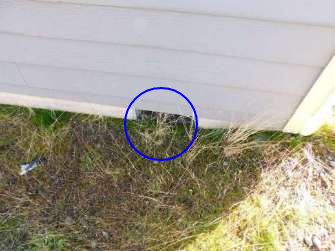
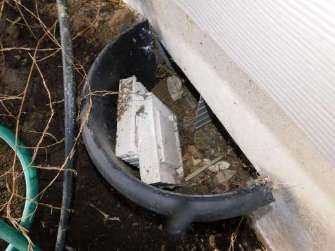
Large gaps occurs at the base of all access doors and access doors at the West side of the structure had gaps around the doors themselves when closed large enough to allow vermin intrusion. I recommend a qualified contractor repair any gaps or openings at all crawlspace entrances and consult with a pest management professional as necessary to control rodent activity.

Photos below are examples of vermin intrusion entry points and illustrative evidence of habitation:
Photo
Photo 57-1 Typical view of West crawlspace access showing large gaps at base of openings
Photo
Photo 57-2 Large gaps at crawlspace entrances, vermin and or water entry point possible at all access openings
Photo
Photo 57-3 Typical view from the interior of crawlspace of access doors closed, showing gaps
Photo
Photo 57-4 North crawlspace entrance with large gaps at threshold
Photo
Photo 57-5 Rodent damage to water supply pipe insulation
Photo
Photo 57-6 Rodent droppings on insulation debris
Photo
Photo 57-7 Some evidence of rodent tunneling and subsequent damage to insulation
Photo
Photo 57-8 Besides vermin intrusion, gaps at crawlspace entrances are allowing water into crawlspace
58) Conducive conditionsA crawl space vent at the West side of the southwest corner of the structure is at, or below, grade and missing a vent wells. When properly installed, wells keep openings into substructure space free from blockages. The present situation impedes ventilation and could allow rain or run-off water to enter substructure space. I recommend further review repair/alter accordingly onsite: Put in wells that provide separation (3"- 4") from earth to the bottom of any vent. Purchase metal or plastic wells at a home store or, a less desirable option, build wells made from pressure-treated lumber. All work to be completed by qualified party such as general contractor. When/if water pipes are wrapped, vents can be left open most of the year, except during extremely cold weather. If vents are closed in frigid weather, they should be reopened immediately after cold weather subsides. Vents require proper screening (typically 1/8"-1/4" corrosion-resistant wire mesh) to protect against pest entry.

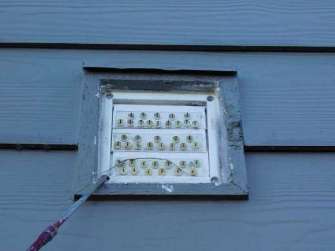
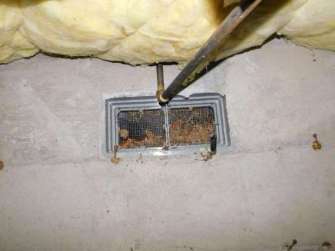
Additionally, at other vents where wells are installed, soil is too high inside the well and or debris is deterring proper airflow through screened vents. It was also noted that the vent well at the northeast corner was loose to the structure and could allow water or debris into well, and substructure. I recommend a qualified party to repair and maintain existing wells as necessary.
Photo
Photo 58-1 Crawl space vent at the South last quarter was at or below grade and could benefit from a well to deter water and or debris into the substructure and control proper ventilation
Photo
Photo 58-2 Existing wells should be maintained, accumulated debris should be removed and soil at interior of well should be below the opening of the vent
Photo
Photo 58-3 Well at north east corner of structure, not properly secured to foundation, gaps at sides. Soil at base of well is at or above the vent opening and debris should be removed. All work should be performed by qualified parties
Photo
Photo 58-4 Crawlspace view of significant debris in the event well
59) Conducive conditionsEarth is uncovered/exposed at some areas of the crawl space: inadequate vapor barrier ground cover. Evaporation from the ground can result in a damp/humid crawl space and high humidity at interior space -- conditions that are conducive to attracting wood destroying organisms. The NW Clean Air Agency estimates that as much as 40% of the air inside a residence has evaporated up from substructure areas. I recommend further review: Repair/replace vapor barrier, as might be necessary, so all earth is covered. If additional material is required, employ 6 mil non-translucent polyethylene (black is preferred) with plastic installed to lay as flat as is possible and seams should overlap by a minimum of 24". Fold or cut ground cover, so it is not in contact with posts/structural lumber -- moisture that collects between plastic and the wood can lead to decay. All work to be completed by qualified party.

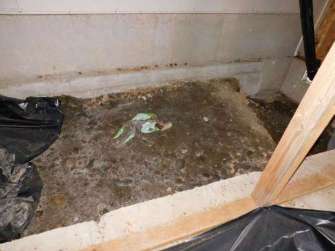
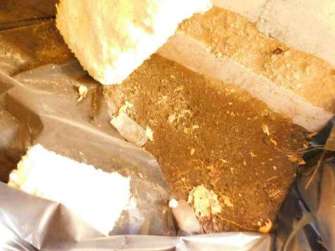
Plastic vapor barrier at all crawlspaces would benefit from repair. All exposed soil should be covered. The photos below are examples of exposed soil and/or damaged vapor barrier:
Photo
Photo 59-1 
Photo
Photo 59-2 

Interior Areas
70) Sinks inspection: Faucets at kitchen sinks at units #102, #103, and #105 were damaged. Drain stoppers were missing at multiple bathroom sinks. Some bathroom sinks were slow to drain. Bathroom sinks at the upper floor bathroom at unit #103 had reversed plumbing where hot and cold are reversed from current standards and label indicators on sink faucets. Typically hot would be to the left, which is correct and consistent with all her bathroom sinks with this exception at unit #103.
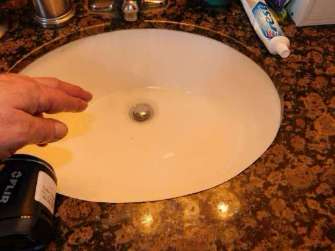
Grout at all kitchen and some bathroom counter backslashes has failed or deteriorated at many visible locations.
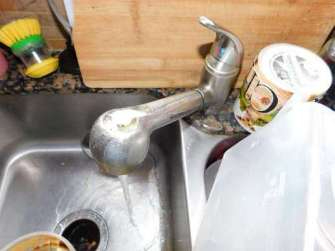
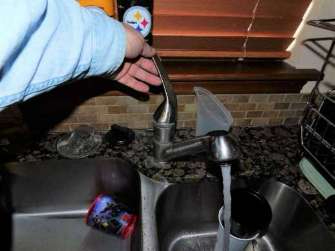
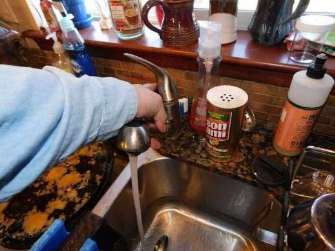
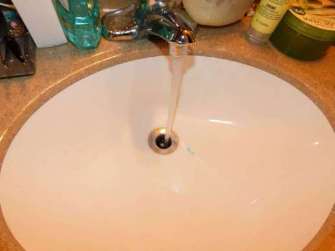
I recommend further review, and appropriate repairs, with work to be performed by a qualified plumber and or contractor as necessary.

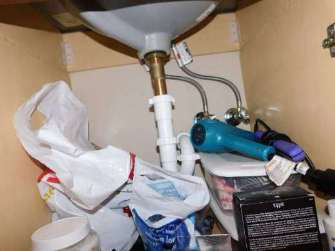
Countertops, areas below sinks, sink basins were obscured by stored items to some degree at all units and cannot be fully evaluated.

Inspection procedure: Inspector looks for signs of past, or possibly present, leaks or seepage. A slow, intermittent or concealed leak may be undetectable at the time of inspection. Minor deficiencies at sinks and piping can result in interior damage. Caulk and/or grout around fixtures requires periodic maintenance and eventual replacement.
Photo
Photo 70-1 Damage kitchen faucet at unit #102
Photo
Photo 70-2 Damage kitchen faucet handle at unit #103
Photo
Photo 70-3 Damage kitchen faucet at unit #105
Photo
Photo 70-4 Drain stopper is missing at multiple bathroom sinks
Photo
Photo 70-5 Bathroom sinks drain slowly at multiple bathrooms
Photo
Photo 70-6 Failed or deteriorated grout was noted at all kitchen and some bathroom counter backsplashes
Photo
Photo 70-7 Both sinks at the upper floor bathroom at unit #103 had reversed plumbing, hot and cold reversed.

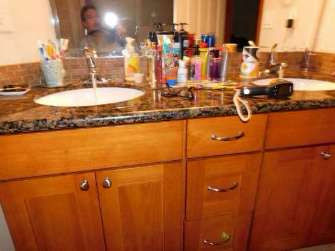
Also note that personal belongings on countertops deter a full evaluation
Photo
Photo 70-8 Some visual limitations are unavoidable due to storage and personal belongings. These limitations occur at all units
71) Conducive conditionsToilet(s) inspection: A toilet of the upstairs bathroom in unit #102 was loose where it attached to the floor. Leaks can occur. Flooring, the subfloor or areas below make it damaged. Sewer gases can enter the living spaces. I recommend that a qualified party, such as a plumber remove the toilet for further evaluation and repair if necessary. A new wax ring should be installed in toilet should be securely anchored to the floor to prevent movement and leaking. Additionally, the tank fill spout at the hall bathroom at the upper floor of unit #104 was operational but appeared to be intermittent. The device was labeled as "anti--siphon" and could just be the functionality of that specific design. If concerned, while on-site for other plumbing issues, I recommend consulting with a qualified plumber.

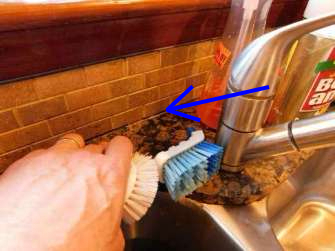
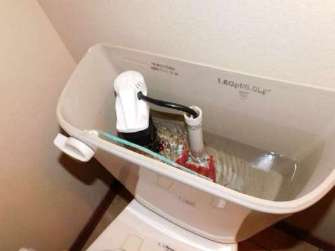
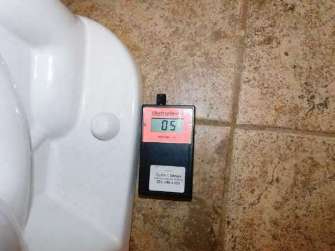
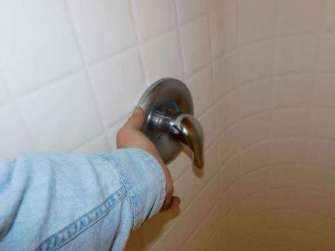
General observation at all toilets: Caulking has either not been installed, damaged or deteriorated. Preferably, an installer will seal the front and sides of a toilet but leave a gap of a few inches at the back. The seal protects against moisture entry and is, also, hygienic in nature. The back of a fixture is left open so, if the wax ring-seal (under a toilet) leaks, a resident will be more likely to detect seepage and seek professional assistance. I recommend further evaluation, and appropriate repairs, with work to be completed by a qualified plumber.


Inspection procedure: Inspector looks for signs of past, or possibly present, leaks or seepage. A non-invasive moisture meter may be employed to check flooring at bases of toilets. Regardless, a slow, intermittent or concealed leak could be undetectable at the time of inspection. Minor deficiencies at toilets can result in interior damage. Depending on belongings present and flush mechanism attachment, inspector might not remove tank lids. Caulking or grout, around bases of toilets, requires periodic maintenance and eventual replacement.
Photo
Photo 71-1 Toilet at the upstairs bathroom at unit #102 was loose to the floor
Photo
Photo 71-2 Tank fill spout at hall bathroom at upper floor in unit #104 was operational but appeared to be intermittent
Photo
Photo 71-3 12 toilets were noted and inspected at time of inspection. Moisture readings were taken at all bathroom floors and around toilets. No elevated moisture was noted.
72) The ranges are Whirlpool brand, gas electric. Where accessible, main burners heated, as did the oven and broiler elements. Some ranges were not fully evaluated due to pans on cooktop or in oven. However, all ranges tipped forward when pressure was applied. This is a safety concern, especially so for children, who might pull on or climb on the range. I recommend further review and appropriate repair: Install a standard anti-tip bracket to better secure the range. All work to be completed by qualified appliance installation-repair professional.

Findings are limited to conditions observed at the time of the inspection. I do not estimate remaining life. Prior to purchase, client(s) are advised to ascertain that the condition (age, cleanliness and functionality) of appliances meets with personal expectations.

Inspector does not verify internal temperatures, the operation of timers, clocks, convection ovens, warmer burners or drawers, appliance lights, or seal/fit of gaskets. Due to potential pitfalls, I do not move appliances, remove drawers to view connections, gas valves, brackets, mounting hardware, etc. Upon taking occupancy, clients are encouraged to move appliances to obtain better access and view. If any issues are discovered, consult with knowledgeable repair persons.
73) Conducive conditionsTub(s)/shower(s) inspection: The gap, behind the tub spout at multiple bathtubs, could allow moisture entry into the walls. If a spout gap is small enough, caulking can be applied. A more permanent solution is to put in place an escutcheon trim plate that can be installed at the back of the spout. Additionally, escutcheon trim plate at multiple showers and bathtubs were loose at time of inspection. Also, shower faucet handle in the master bathroom of the upper floor at unit #105 had reversed plumbing where indicated at handle, hot and cold are reversed.

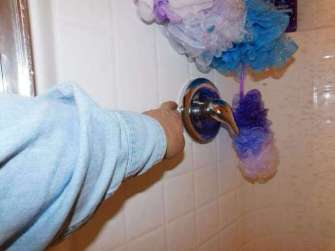
I recommend further assessment, and appropriate repairs, with work to be completed by a qualified plumber.

Inspection procedure: Inspector looks for signs of past, or possibly present, leaks or seepage. A slow, intermittent or concealed leak might not be readily apparent at the time of inspection. Minor deficiencies at fixtures can result in interior damage. Caulk and/or grout around fixtures requires periodic maintenance and eventual replacement.
Photo
Photo 73-1 
Photo
Photo 73-2 Example of escutcheon trim plate gaps
Photo
Photo 73-3 Some escutcheon trim plates were loose
Photo
Photo 73-4 Reversed plumbing was noted at the shower faucet handle at master bedroom, unit #105
74) Carpeting at all units is loose. I recommend further review: As applicable, repair/re-stretch the carpet as necessary. All work to be completed by qualified carpet installation professional.

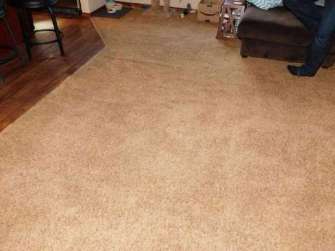
Loose carpeting was noted throughout the interior of all units. Due to significant amounts of furniture and stored items, not all carpet areas could be evaluated for further damage.
Photo
Photo 74-1 Loose carpet was noted at all units. Some existing ripples in carpeting could pose a tripping hazard. I recommend further review and necessary repairs by qualified carpet professional